

Waking up to a freezing cold travel trailer is no one’s idea of a good time. A malfunctioning furnace can quickly turn a fun adventure into a chilly ordeal. While some issues require a professional, many common problems are surprisingly easy to diagnose and fix yourself. This comprehensive guide will walk you through the steps of travel trailer furnace repair, from basic troubleshooting to knowing when to call in the experts. You’ll learn how to identify problems, perform essential maintenance, and stay safe while working on your RV’s heating system. Let’s get that warm air flowing again and get you back to enjoying your travels in comfort.
Key Takeaways
- Safety First: Always disconnect the propane supply and electrical power before beginning any furnace repair work.
- Common Culprits: Many furnace issues stem from simple problems like low battery voltage, an empty propane tank, or a clogged air return.
- Troubleshooting Steps: A systematic approach to checking the thermostat, sail switch, and pilot light can help you quickly pinpoint the source of the problem.
- Preventative Maintenance is Key: Regularly cleaning your furnace components and inspecting for blockages can prevent most common failures.
- Know Your Limits: While many repairs are DIY-friendly, issues involving the gas valve, circuit board, or motor often require a certified RV technician.
Understanding Your Travel Trailer Furnace
Before diving into any travel trailer furnace repair, it’s helpful to understand the basic components and how they work together. Your RV furnace is a forced-air system, similar to the one in your home, but designed to operate on 12-volt DC power and propane. When you turn up the thermostat, a sequence of events begins. First, the blower motor kicks on to circulate air. This airflow triggers the sail switch, which then tells the control board it’s safe to proceed. The control board opens the gas valve and sends a spark to the igniter, lighting the propane in the combustion chamber. The heat generated warms a metal heat exchanger. Finally, the blower pushes air from inside your RV across the hot heat exchanger and distributes it through your vents, warming your living space.
H3: The Main Components of an RV Furnace
Every part of your furnace plays a crucial role in this heating process. Understanding these individual components will make your troubleshooting efforts much more effective.
- Thermostat: This is the control center. It senses the temperature and tells the furnace when to turn on and off.
- Blower Motor: This powerful fan does two jobs: it pulls air from your RV to be heated and pushes the warm air back out through the ducts.
- Sail Switch: A safety device that ensures there is adequate airflow before allowing the furnace to ignite. If the blower is weak or an air vent is blocked, this switch prevents startup.
- Control Board (or Circuit Board): The “brain” of the furnace, it manages the entire sequence of operations, from ignition to shutdown.
- Igniter & Electrode Assembly: This component creates the spark needed to light the propane. In older models, you might have a pilot light instead.
- Gas Valve: Controls the flow of propane to the combustion chamber.
- Heat Exchanger: A sealed metal chamber where the propane is burned. It gets very hot and transfers that heat to the air being circulated through your RV.
- Exhaust Vent: This allows the harmful byproducts of combustion, like carbon monoxide, to be safely vented outside.
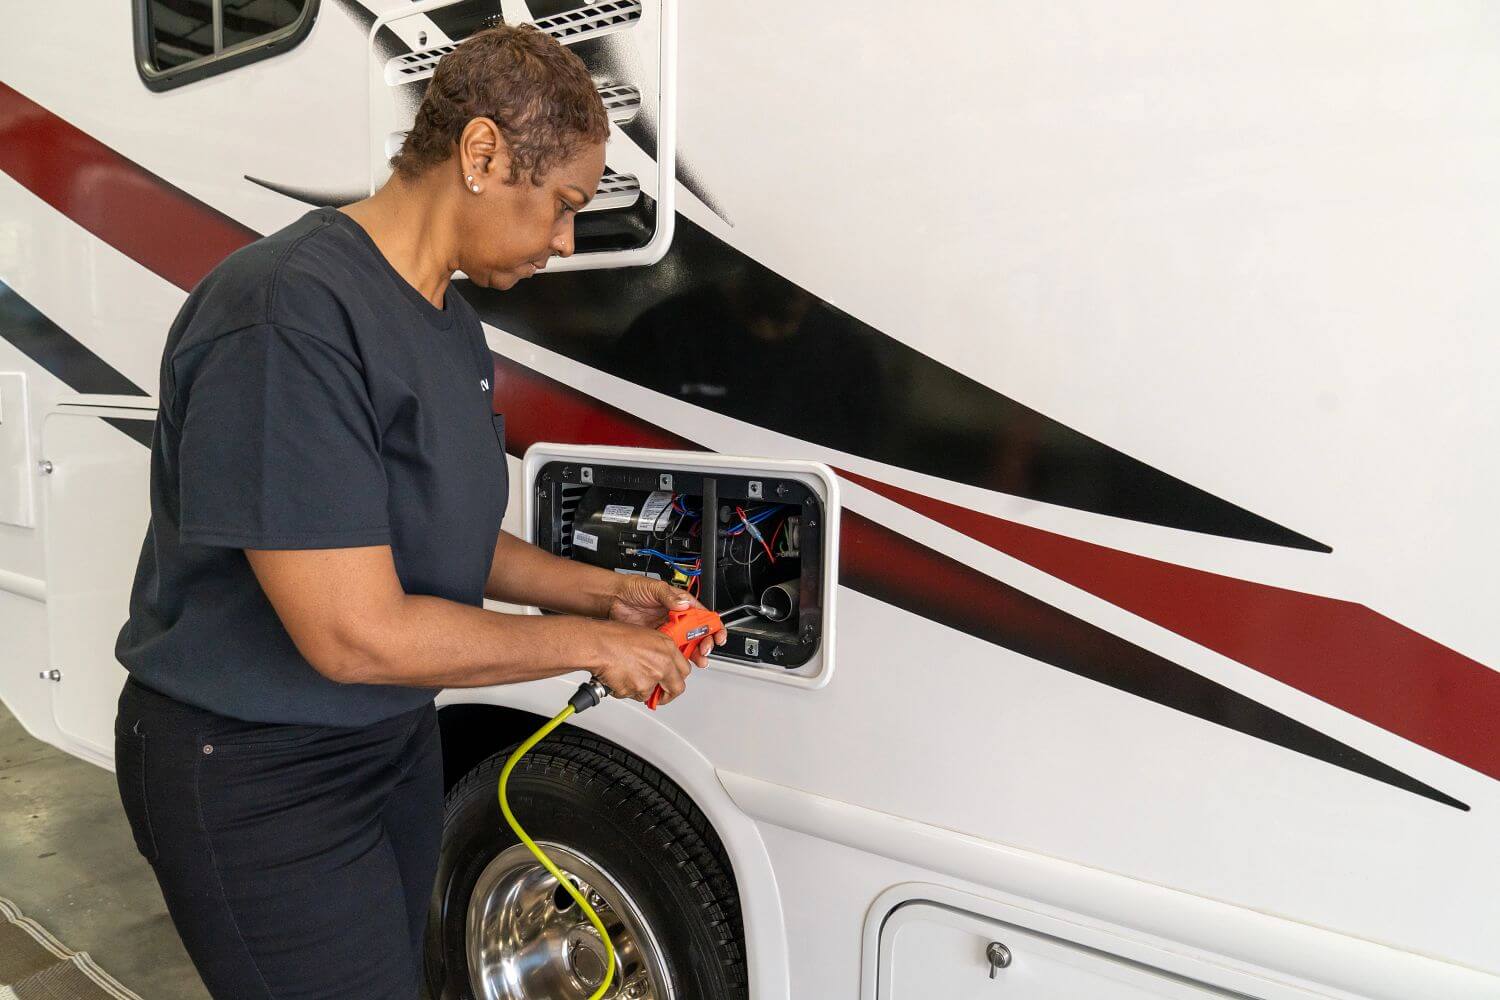
Safety First: Essential Precautions for Furnace Repair
Working on any appliance that involves both electricity and propane requires the utmost caution. Your safety, and the safety of your family, is the number one priority. Before you even think about opening the furnace access panel, you must take several critical safety steps. Ignoring these could lead to gas leaks, electrical shock, or fire. Always begin your travel trailer furnace repair by turning off the propane supply directly at the tank. Next, disconnect all power to the furnace. This includes unplugging your RV from shore power and turning off the 12-volt battery system using your master disconnect switch. If you are not completely sure how to do this, consult your RV’s owner’s manual. Finally, make sure the area is well-ventilated, especially if you suspect a propane leak.
H3: Tools and Supplies You’ll Need
Having the right tools on hand will make your repair process smoother and safer. You don’t need a professional mechanic’s entire toolbox, but a few key items are essential. Gather these before you start so you’re not scrambling to find something midway through the job.
- Multimeter for checking voltage and continuity
- Set of screwdrivers (Phillips and flathead)
- Socket or nut driver set
- Pliers (needle-nose are especially useful)
- Canned air or an air compressor for cleaning
- Soft brushes for cleaning delicate parts
- Flashlight or headlamp
- Protective gloves and safety glasses
Having these tools ready will equip you for most basic travel trailer furnace repair tasks you might encounter on the road.
Common Furnace Problems and How to Troubleshoot Them
When your furnace stops working, it often displays specific symptoms that can point you toward the root cause. The most common scenario is that the furnace tries to start—you hear the blower kick on—but it never actually produces heat and then shuts down after a minute or two. This cycle might repeat a few times before the system locks out for safety. Other times, the furnace might not do anything at all when you turn up the thermostat. By systematically checking the most likely culprits, you can often solve the problem without a costly trip to the service center. This section will guide you through diagnosing the most frequent issues related to travel trailer furnace repair.
H2: Furnace Blower Runs, But No Heat
This is arguably the most common furnace failure. You hear the fan start, but warm air never comes out of the vents. This tells you that the furnace is getting power and the thermostat is working, but the ignition sequence is failing somewhere along the way. The problem usually lies with the propane supply, the sail switch, or the igniter. Start by checking the simple things first. Do you have propane in your tanks? It sounds obvious, but it’s a frequent oversight. If you have a two-tank system, ensure the regulator is switched to the full tank. Next, light your stove burners to confirm that propane is flowing to your appliances. If the stove works, you can rule out a propane supply issue and move on to inspecting the furnace components themselves.
H4: Checking the Sail Switch
The sail switch is a small safety device with a big job. It’s a micro-switch with a plastic “sail” attached. When the blower motor turns on, the airflow pushes this sail, which closes the switch and tells the control board that it’s safe to ignite the furnace. If the airflow is too weak due to low battery voltage, a blocked return air vent, or an insect nest in the blower cage, the switch won’t activate. To check it, you’ll need to access your furnace. It’s typically located right next to the blower motor. After turning off all power, you can often remove it with one or two screws. Listen for an audible “click” as you manually move the sail. You can also use a multimeter set to continuity to test if the switch is working correctly. Cleaning the sail and the area around it can often solve the problem.
H4: Inspecting the Igniter and Electrode
If the sail switch is working, the next step in the sequence is ignition. The control board sends a high-voltage signal to the electrode assembly, which creates a spark to light the gas. Over time, this electrode can become coated with carbon or get knocked out of position. The gap between the electrode tips is critical; it should typically be about 1/8 of an inch. If the gap is too wide or too narrow, it won’t produce a strong enough spark. You should also inspect the ceramic insulator for any cracks. A cracked insulator can cause the spark to ground out instead of jumping the gap. Gently cleaning the electrode tips with a bit of fine-grit sandpaper or an emery board can often restore proper function. This is a delicate but crucial part of travel trailer furnace repair.
H2: Furnace Won’t Turn On at All
If there’s complete silence when you call for heat, the problem is likely electrical. The furnace isn’t receiving the signal to start. Your troubleshooting should begin with the most basic elements of the electrical system. Start at the thermostat. Are the batteries in the thermostat fresh? Many digital RV thermostats have their own batteries. Next, check your RV’s 12-volt system. A furnace blower motor requires a significant amount of power to start, and if your house batteries are below about 12 volts, the system may not have enough power to even begin the startup sequence. Plug into shore power or start your generator to see if that resolves the issue. If it does, you know the problem is with your battery bank. If not, you’ll need to check the furnace’s fuse and reset switch.
H4: Checking Fuses and the Reset Switch
Every furnace is protected by a fuse, which is usually located in your RV’s main 12-volt fuse panel. It will be labeled “Furnace” or “HTR” (for heater). Pull the fuse and visually inspect it to see if the small metal strip inside is broken. Even better, test it with a multimeter. If the fuse is blown, replace it with one of the exact same amperage. Never use a higher-rated fuse, as this creates a serious fire hazard. Most furnaces also have an onboard on/off/reset switch located on the unit itself. It can sometimes be accidentally bumped into the “off” position during storage or travel. Locate this switch and make sure it’s set to “on.” Sometimes, simply toggling this switch off and back on can reset the control board and solve the problem.
DIY Furnace Maintenance for Prevention
The old saying “an ounce of prevention is worth a pound of cure” is especially true for travel trailer furnace repair. Most major furnace failures can be avoided with a simple annual maintenance routine. Performing these checks at the beginning and end of each camping season will ensure your furnace operates safely and efficiently when you need it most. This proactive approach not only saves you from cold nights but also extends the life of your furnace and saves you money on potential repairs. You don’t need to be a certified technician to perform these essential tasks. A little bit of cleaning and careful inspection can make a world of difference. For those looking for great travel tips and gear reviews, you might find resources like reelsaround.co.uk helpful in preparing for your journeys.
H3: Cleaning the Furnace and Vents
Dust, dirt, pet hair, and debris are the enemies of your RV furnace. Over time, this buildup can restrict airflow, clog critical components, and even become a fire hazard. At least once a year, you should perform a thorough cleaning. Start by vacuuming the interior furnace compartment and the return air grille. Use a soft brush and canned air to carefully clean the blower wheel, ensuring all the fins are free of debris. A dirty blower wheel can’t move enough air, which can cause the sail switch to malfunction and the furnace to overheat. Also, take the time to inspect the exterior intake and exhaust vents. These are a favorite nesting spot for insects like mud daubers and spiders. A blockage here is extremely dangerous, as it can cause carbon monoxide to build up inside your RV.
H3: Inspecting Propane Lines and Connections
While you have everything open for cleaning, it’s the perfect time to inspect the propane system connected to your furnace. You are not making adjustments to the gas pressure, but simply checking for obvious issues. Visually inspect the propane line leading to the furnace for any signs of cracking, kinking, or wear. Check the fittings at the gas valve and along the line to ensure they are snug. You can perform a simple leak test by mixing a solution of soap and water in a spray bottle. With the propane turned on, spray this solution on all the connections. If you see any bubbles forming, it indicates a gas leak. If a leak is detected, turn off the propane immediately, ventilate the area, and do not proceed with any travel trailer furnace repair until the leak is fixed by a qualified technician.
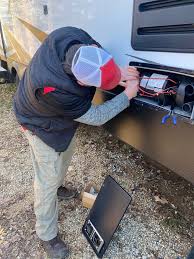
When to Call a Professional RV Technician
While many aspects of travel trailer furnace repair are manageable for a handy RV owner, it’s crucial to recognize your limitations. Certain repairs involve a high level of risk or require specialized tools and knowledge. Attempting to fix complex components like the gas valve or the main control board without proper training can lead to dangerous situations, including gas leaks, fire, or carbon monoxide poisoning. It’s always better to be safe and call a certified RV technician if you’re unsure about a repair. A professional can accurately diagnose the problem and ensure the repair is done correctly and safely, giving you peace of mind. The cost of a service call is a small price to pay for your safety and the proper functioning of your heating system.
H2: Signs You Need an Expert
Some furnace symptoms are clear indicators that the problem is beyond a simple DIY fix. If you encounter any of the following issues, it’s time to put away the tools and make a phone call.
- Persistent Smell of Propane: If you smell propane around your furnace even after checking for obvious leaks, turn off the gas supply immediately and call a pro. This could indicate a faulty gas valve, which is not a user-serviceable part.
- Yellow or Sooty Burner Flame: The flame inside your furnace’s combustion chamber should be a strong, steady blue. A yellow, flickering, or sooty flame indicates poor combustion, which can produce dangerous levels of carbon monoxide.
- Control Board Failure: If you’ve used a multimeter to confirm that power is reaching the control board but nothing is happening, the board itself may have failed. Replacing a control board is a complex task that’s best left to an expert.
- Motor or Bearing Noises: If your blower motor is making loud squealing, grinding, or rattling noises, the bearings are likely failing. Replacing the motor is an intensive job that often requires disassembling most of the furnace.
Furnace Repair Cost Comparison: DIY vs. Professional
Deciding between a DIY repair and hiring a professional often comes down to cost and complexity. Here’s a table to help you weigh the options.
|
Repair Task |
DIY Cost Estimate |
Professional Cost Estimate |
Recommendation |
|---|---|---|---|
|
Cleaning & Maintenance |
$5 – $20 (canned air, brushes) |
$150 – $250 |
DIY |
|
Sail Switch Replacement |
$15 – $30 (part cost) |
$175 – $300 |
DIY |
|
Thermostat Replacement |
$30 – $100 (part cost) |
$150 – $250 |
DIY |
|
Igniter Electrode Replacement |
$20 – $40 (part cost) |
$200 – $350 |
DIY (for handy owners) |
|
Control Board Replacement |
$150 – $250 (part cost) |
$400 – $600 |
Professional |
|
Blower Motor Replacement |
$100 – $200 (part cost) |
$500 – $800 |
Professional |
|
Gas Valve Replacement |
$80 – $150 (part cost) |
$450 – $700 |
Professional |
Note: Professional costs are estimates and include parts and labor. Rates can vary significantly based on location and service provider.
Conclusion
Successfully completing a travel trailer furnace repair can be an empowering and cost-saving experience. By understanding how your furnace works and following a logical troubleshooting process, you can solve many common issues yourself. Remember to always prioritize safety by disconnecting power and propane before you begin. Regular cleaning and maintenance are your best defense against unexpected breakdowns, ensuring your furnace is ready to keep you warm on all your adventures. However, it’s just as important to know when a problem is beyond your skill set. For complex electrical or gas-related issues, don’t hesitate to call a certified RV technician. Keeping your furnace in top shape is a key part of responsible RV ownership, allowing you to travel comfortably and safely, no matter the weather. For more in-depth information on the principles of forced-air heating systems, you can find extensive documentation on platforms like Wikipedia, which covers the history and mechanics of these essential devices.
Frequently Asked Questions (FAQ)
Q1: Why does my RV furnace fan run but there’s no heat?
This is the most common issue and is usually caused by one of three things: a low propane supply, a faulty sail switch, or a dirty/failed igniter. First, confirm your propane tanks aren’t empty. Then, check for obstructions in your air vents that might be preventing the sail switch from activating. Finally, inspect and clean the igniter electrode.
Q2: How often should I perform maintenance on my travel trailer furnace?
It is highly recommended to perform a thorough inspection and cleaning at least once a year. The best times are at the beginning of the camping season to ensure it’s ready for use, and at the end of the season to clean out any debris from your travels before putting the RV into storage.
Q3: Is it safe to perform my own travel trailer furnace repair?
Many repairs, such as cleaning components, replacing a sail switch, or changing a thermostat, are safe for a DIYer. However, any repair involving the main gas valve, the control board, or the blower motor should be handled by a certified professional. Always disconnect power and propane before working on your furnace.
Q4: My furnace keeps clicking but won’t light. What’s wrong?
The clicking sound is the igniter trying to create a spark. If it clicks repeatedly but the furnace doesn’t ignite, it could mean the igniter’s electrode is dirty, damaged, or misaligned. It could also indicate that the gas valve isn’t opening to supply propane for the spark to light. Check to ensure your propane is on and the lines aren’t blocked.
Q5: Can I run my RV furnace on just battery power?
Yes, RV furnaces are designed to run on the 12-volt DC power provided by your house batteries. However, the blower motor uses a significant amount of power. If you are boondocking, running the furnace frequently can drain your batteries quickly. Your battery bank must be sufficiently charged (ideally above 12.2 volts) for the furnace to operate correctly.